System Architect | Simon Kelly: renegade-empire.com
You’ll no doubt be aware that sending a newsletter to your existing customers on a regular basis is not only a great way to engage with them, but also a way to promote new products and services and give other important updates that your company might have. But if you’re the one that has been tasked with organising the newsletter to send out to your email list, it can be a daunting task when you haven’t had to do it before.
Sending a newsletter isn’t actually as overwhelming as you think it may be when you have a system to follow on exactly how to go about doing it. The process outlined below takes you through the tools that you need in order to prepare, how to create the newsletter and what content to use, and finally how to test that you’ve got everything working correctly before you send it off to your customers. Once you work through this system a few times, sending newsletters will become like second nature and you’ll be able to complete the process more quickly and smartly.
Creating Newsletter to Engage Existing Customers
Purpose / Outcome
Once the process is complete, you will have a system for preparing, creating, testing and sending a highly engaging newsletter.

Why it’s Important
Sending email communications to your list is important to stay top of mind, which helps to build your authority, increase engagement in your list, and increase the likelihood of closing more deals with more prospects.
What You Will Need Before Doing This
Marketing Tool: MailChimp / Active Campaign / other
Logins / URLs to access the systems: (Logins / Passwords shared via LastPass)
Google Docs Templates
Click the links and then go File > Make a Copy.
Email Marketing Strategy Template »
Email Marketing Content Template »
MailChimp template
Click this link to import into your account »
ActiveCampaign template
Click this link then follow the instruction >>
Overview
- Set up (one-time)
- Find articles
- Prepare images
- Prepare content
- Create Newsletter
- Test and Deliver
- Share
- Finish here
Steps to Do It
Step 1: Set Up (one-time)
- Email marketing strategy
- Access and duplicate the Email marketing strategy document
- Review the content marketing strategy goals and target audience to align what we are doing in email marketing matches what we are doing in our other marketing. Fill in the worksheet with your answers.
- Set up folders and documents
- Create Google Drive folder with the name of the newsletter e.g. Marketing Mondays
- Within the folder, create a folder with the name of your newsletter + Date e.g. Marketing Mondays June.
- The newsletter folder will contain the images for the newsletter, as well as a Google Document with the content for the newsletter
- Duplicate the Google Doc template for the articles and add to the folder you just created
- Gather content sources
- Content sources – internally produced content
- Blog, Podcast, Youtube, Product updates, Events
- Content source – Ideas
- Add ideas to the email marketing strategy document
- Create a dedicated channel in Slack for sharing ideas
- Content sources – external (via Feedly)
- Sign up to Feedly
- Add subscriptions for blogs and news sources within your niche
- Use keywords to search for and add additional sources. You can see how popular the source is and how frequently they post from within the search results.
- Organise the content into the primary categories for your audience
- Content sources – external (via Buzzsumo)
-
-
- Visit Buzzsumo
- Add a keyword that is related to your industry or to this specific newsletter e.g. “email marketing”
- Gather the most relevant and most shared article links
- These will be used as part of timeless reads section in the newsletter
- Add email templates
- Create templates within your email marketing system to suit the sections of content
- Quickstart: import the existing templates
- MailChimp: http://bit.ly/NewsTemplateMailchimp
- ActiveCampaign: http://bit.ly/NewsTemplateActiveCampaign
- Update the template to suit your brand
- Logo
- Links and social media
- Save as template
-
- Content sources – internally produced content
Step 2: Create New Edition
- Set up folder and document
- Open the Google Drive folder Renegade Empire > Marketing > Marketing Monday
- Create a new folder with the name Marketing Monday YEAR MONTH DAY and rename to suit the date of the next edition
- Duplicate the file Marketing Monday Articles YEAR MONTH DAY and rename to suit the date of the next edition
- Add the new document to the new folder
- Review idea areas and choose suitable articles
- Google Doc for ideas
- Slack for ideas
- Feedly subscriptions
- Suitable articles are a mix of digital marketing, website improvements, interesting online news, something fun and technology.
- Choose timeless reads
- These are articles that have been published sometime in the last 12 months but not necessarily in the last few weeks
- To find your articles for the Timeless Reads, login to BuzzSumo and go to the most shared tab.
- In the filter section choose Past Year.
- Type a keyword into the search box that matches one of the articles in this week’s newsletter.
- Choose an article from the search results that have high share numbers.
- Buzzsumo screenshot: https://cl.ly/2G1e3D001o2q
- Add article title, URL, author and image credit to the Newsletter Google Doc
Step 3: Prepare Images
- Download the images that correspond to the articles
- Change the image name to the same name as the article title
- Resize the images
- Open the newly saved image using Preview on the Mac.
- Click “Tools” then “Adjust Size”.
- Use the dimensions: 600px x 300px. Make sure you keep the image proportional – do not skew the image when resizing it.
- Repeat above steps for each image in the newsletter.
- Optimise image size for the web using JPEGmini or TinyJPG or TinyPNG. This keeps the file size small.
- Add the prepared images to the Google Drive folder for the current newsletter.
Step 4: Prepare Content
- Within the Newsletter Google Doc, add description below the title for each article
- Write engaging descriptions of no more than one sentence that will encourage readers to click through and read more.
Step 5: Create Newsletter
- Login to ActiveCampaign and create a new campaign
- Name the campaign in the format with the correct issue number: e.g. Marketing Monday Issue #128
- Make sure the issue number is one greater than the one sent previously
- Select the relevant list
- Select the template
- Add the sender details
- [name]
- [email address]
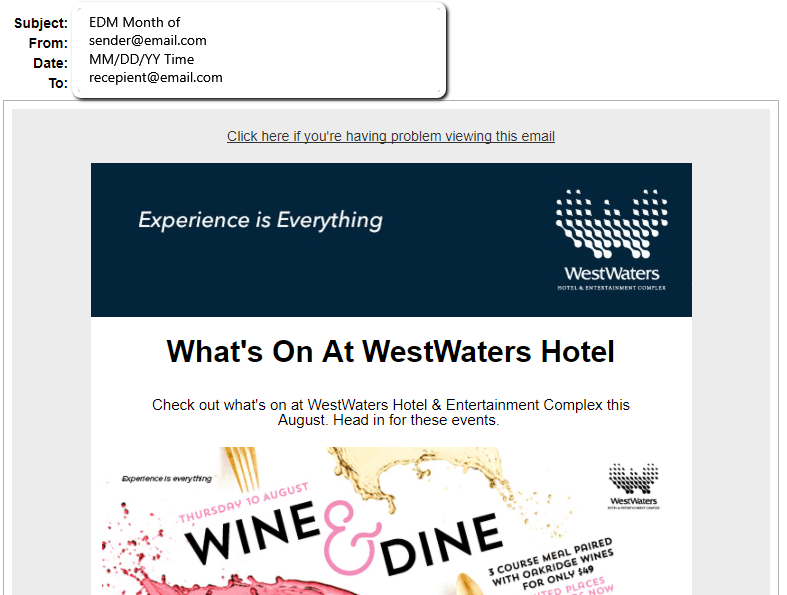
- Add the content for this newsletter
Step 6: Test and Deliver
- Within the Summary stage of the campaign, preview the campaign and check for issues
- Spelling
- Check links
- Image alignment and proportions
- Send the campaign to [your email] to test. Screenshot: https://cl.ly/3e052u3S0k39
- Once you get the all clear that the email is good to go you can click the Schedule button and schedule the email for release at 17:00 (5 pm) Monday afternoon AEST. That means our American subscribers will get it when they wake up and our UK subscribers will get it at approx. 8 am.
- Click on Finish to set the schedule
- Confirm that this has been scheduled by going to the campaigns section and clicking on scheduled and confirm the date, time and issue number
Step 7: Share
- Login to social sharing app
- Create posts for all the articles in the newsletter
- Select Facebook and Twitter accounts
- Enter description of article and shorten links (entire message needs to be less than 140 characters)
- Make sure image to share is interesting
- Repeat for each article in the newsletter
- Screenshot to show the message for Twitter including image and hashtags https://cl.ly/2K3C2W0A0E3Y
Step 8: Finish Here
- You will know this process is complete when the email has arrived in your inbox and the social media messages are scheduled in the queue.
What Done Looks Like
You will know this process is complete when the email has arrived in your inbox.
Checklist
1 – Set up – once the set up is complete, be sure to communicate the process to the ensure team. If the set up has been created proceed to step 2.
2 – Prepare content and images – contents are more effective when linked to company’s website. Prepare links and headers that will engage the audience.
3 – Design the campaign – make sure that the campaign is designed within company branding guidelines (colours, fonts), make sure alignments are followed.
4 – Send test – send a test email to self and to another colleague to ensure quality and that all links are going to the correct landing page before sending.
5 – Deliver – once testing is complete, set the campaign to schedule or send it out immediately, depending on your planned release time.
If You Have a Problem
Who should you contact if you have an issue?
Contact your project manager via Slack if you have an issue or question.
The important thing to remember when you are organising to send a newsletter out to your email list, is that you are doing it to keep in the front of your clients’ minds. The type of content that you choose to share, the images you use, and the email subject line will all play a factor on whether your customers will actually open your email and want to engage. Once you start sending emails out, you can take advantage of the many analytics tools on offer to be able to determine what is working and what isn’t.
Be sure to follow this process from start to finish, and make the testing stage a crucial step so you can double check that everything is correct before sending the newsletter out.

System Architect – Simon Kelly
 Simon Kelly is a Melbourne based website consultant, designer and web developer that helps businesses get better results from their websites. He helps businesses generate more leads and more revenue through their websites.
He believes that websites are key to a successful digital strategy and he sees many businesses failing with their marketing due to a website that is outdated, hard to navigate and does not generate leads.
That’s where his focus lies – on creating websites that are easy to use, gorgeously designed and work hard to generate leads and sales every day.
Specialties: One of his key speciality areas is with hotels, motels and venues that he helps improve booking rates, reduce third party booking fees, and increase website exposure.
Another speciality area is with eCommerce websites, working with site owners to optimise their website for lead capture and sales.
His Process: To achieve success, he starts with a detailed discovery process. This leaves no stone unturned as they get to the core of what makes the business unique and who the ideal customers are.
He then develops a digital strategy blueprint that outlines how to achieve goals with a focus on the website as the hub of this strategy.